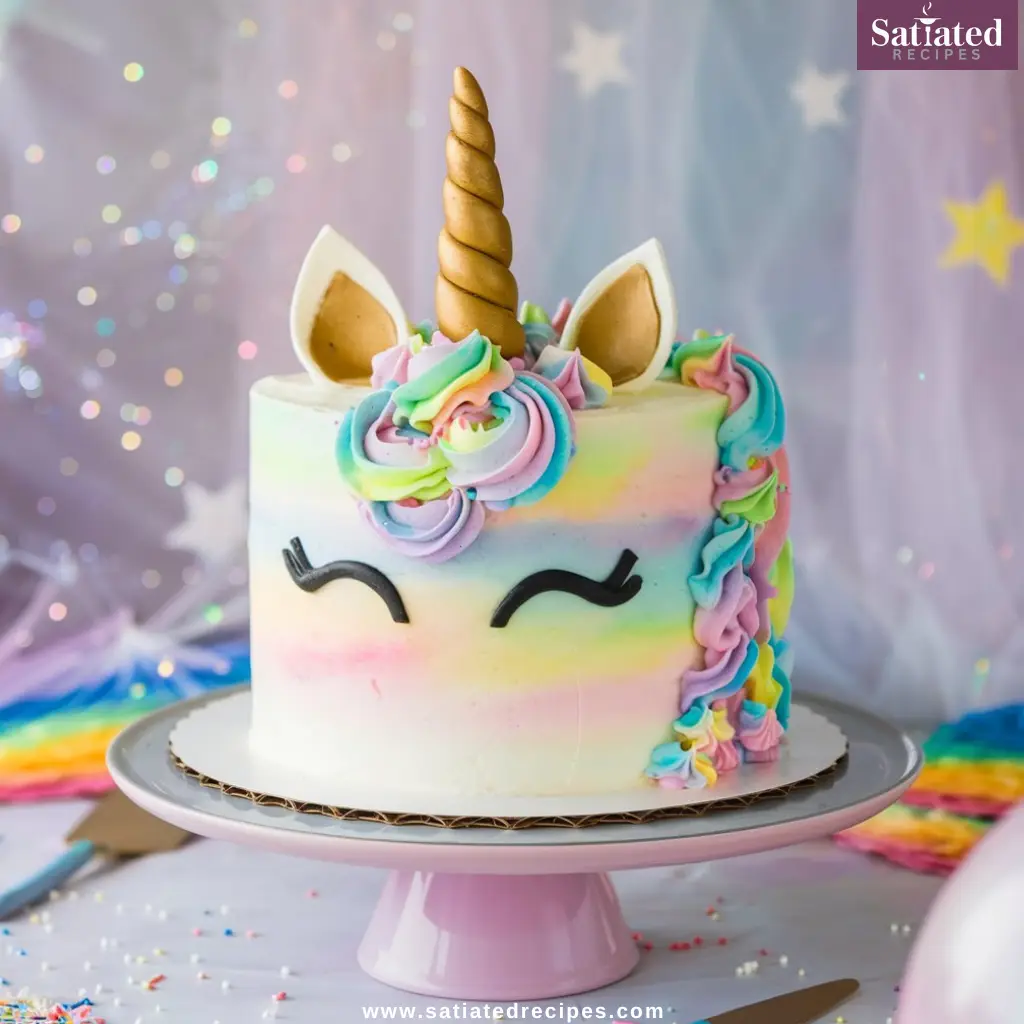
Unicorn cake have become the ultimate showstopper for birthday parties and fantasy-themed celebrations, and it’s easy to see why. With their vibrant colors, whimsical decorations, and magical charm, they bring a sense of joy and wonder to any occasion.
But what if I told you that making your unicorn cake at home is easier than you think? Whether you’re an experienced baker or a beginner, this guide will walk you through every step—from preparing your cake layers to creating dazzling buttercream designs and adding those signature unicorn decorations.
By the end of this tutorial, You’ll create a show-stopping centerpiece that’s sure to wow your guests (and maybe even yourself!). Let’s get started and sprinkle magic in the kitchen!
Key Ingredients and Tools Needed to Create a Unicorn Cake
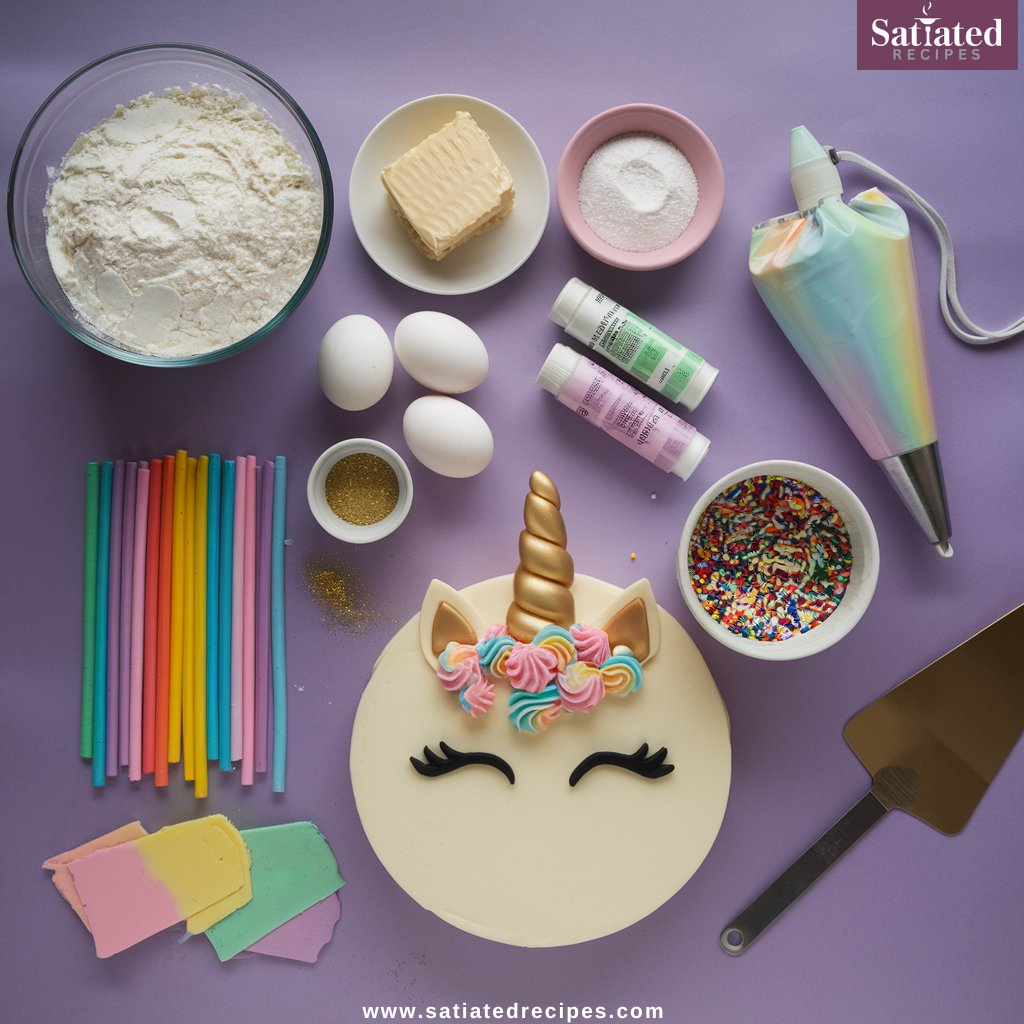
Before diving into the magical world of unicorn cake-making, gathering all the ingredients and tools you’ll need is essential. Having everything ready will make the process smoother and much more enjoyable.
Ingredients for the Cake:
- Flour – For a light and fluffy cake base.
- Sugar – To add sweetness and structure.
- Eggs – For binding and texture.
- Butter or Oil – To keep the cake moist.
- Vanilla Extract – For a delicious, classic flavor.
- Food Coloring – Choose pastel shades for a magical look.
- Baking Powder and Salt – To ensure a perfect rise and balance the flavors.
Ingredients for Frosting and Decorations:
- Buttercream Frosting – The foundation for smooth coverage and colorful designs.
- Fondant – For crafting the unicorn horn and ears.
- Edible Gold Dust – To give the horn and ears their signature shimmer.
- Rainbow Sprinkles – To add extra sparkle.
- Gel Food Colors – For vibrant pastel frosting hues.
Tools You’ll Need:
- Cake Pans – Preferably round pans for layered cakes.
- Turntable – To make frosting and decorating easier.
- Offset Spatula – To achieve a seamless frosting application.
- Piping Bags and Tips – Essential for creating the unicorn mane and decorative swirls.
- Cake Board or Stand – For easy display and transport.
- Serrated Knife – Used to even out the cake layers for a stable structure
With these ingredients and tools, you’re all set to begin crafting your magical masterpiece. Let’s move on to preparing the cake layers!
Preparing the Cake Layers: Building a Strong Foundation
A unicorn cake is only as good as its base, so creating perfectly baked and stable cake layers is key to success. This is where the magic begins, so take your time to ensure the foundation is solid.
Step 1: Choose Your Cake Flavor
The first decision is which flavor to choose. Classic vanilla is a popular option for its subtle flavor and versatility, but you can also go for chocolate or even create a rainbow cake with colorful layers for a more vibrant look. Select a flavor that you know will complement your frosting and decorations.
Step 2: Bake the Cake Layers
Set your oven to the desired temperature and grease your cake pans with butter or line them with parchment paper. Distribute the batter evenly across the pans and bake as directed in your recipe. Be sure to keep an eye on the cake’s progress, as baking times can vary.The cakes are ready when a toothpick inserted into the center comes out clean
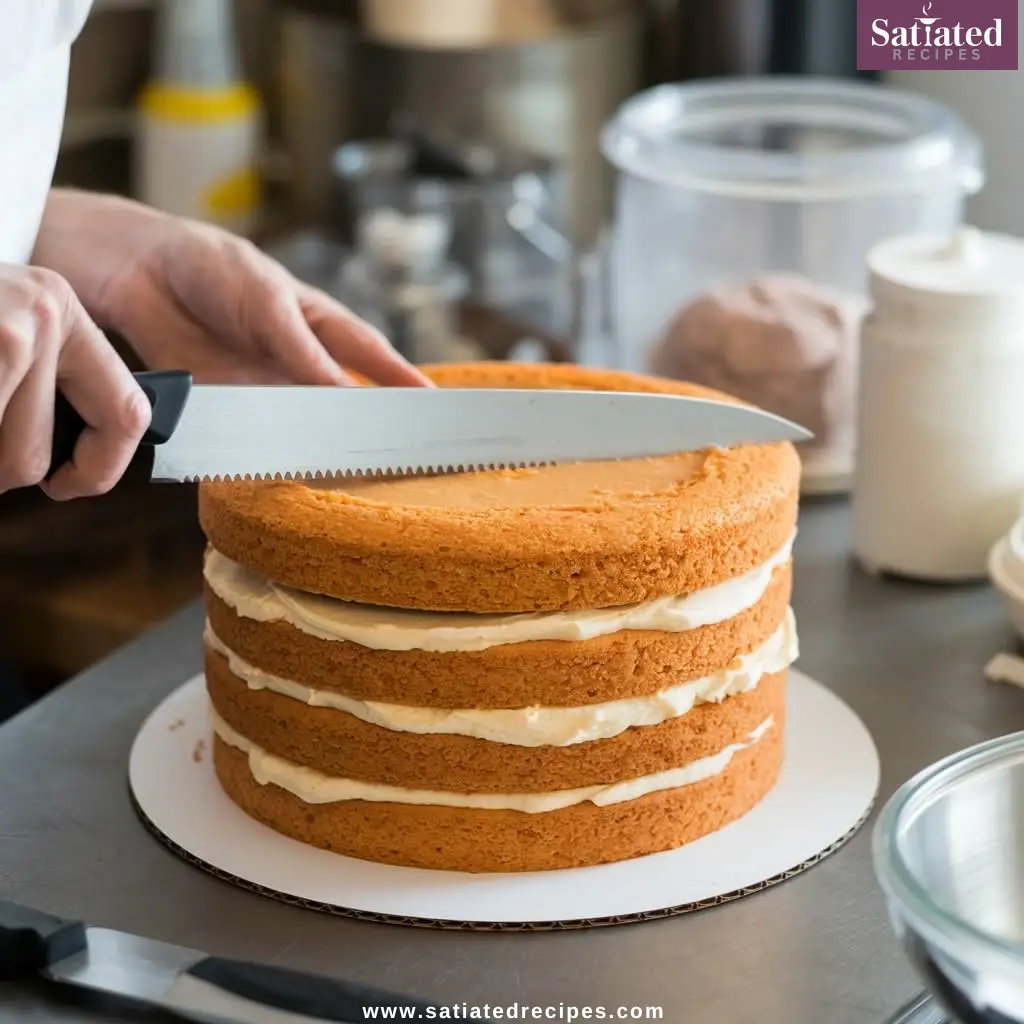
Step 3: Level the Cake Layers
Once your cake has cooled to room temperature, use a serrated knife to level the tops of each layer. This step ensures that your cake layers are even and stable, making them easier to stack and decorate. If you prefer, you can trim off any rounded tops to create flat layers for a neat look.
Step 4: Apply a Crumb Coat
A crumb coat is a delicate layer of frosting that helps lock in any crumbs, creating a smooth surface for the final layers. This will make it easier to add your final layer of frosting without those pesky crumbs showing up. Apply a light crumb coat and refrigerate the cake for about 20-30 minutes to firm it up before you move on to the final frosting layer.
By taking these steps, you’ll build a sturdy, level base for your unicorn cake, ready for all the colorful buttercream and magical decorations that are to come. Next, let’s dive into making that creamy, dreamy buttercream frosting!
Creating the Perfect Buttercream Frosting
Buttercream is the star of the show when it comes to decorating a unicorn cake. Its silky finish and capacity to retain bright hues make it the ideal choice for this whimsical creation. Here’s how to make the perfect frosting that will give your unicorn cake a dreamy, pastel finish.
Step 1: Whip Up Smooth and Fluffy Buttercream
Start with room temperature unsalted butter. Whip it with hand or a stand mixer until it becomes smooth and creamy—This will form the ideal foundation for your frosting. Gradually add powdered sugar, a little at a time, and beat until the mixture is fluffy and light. Stir in a small pinch of salt and a teaspoon of vanilla extract for flavor, Keep mixing until the frosting becomes smooth and easy to spread.
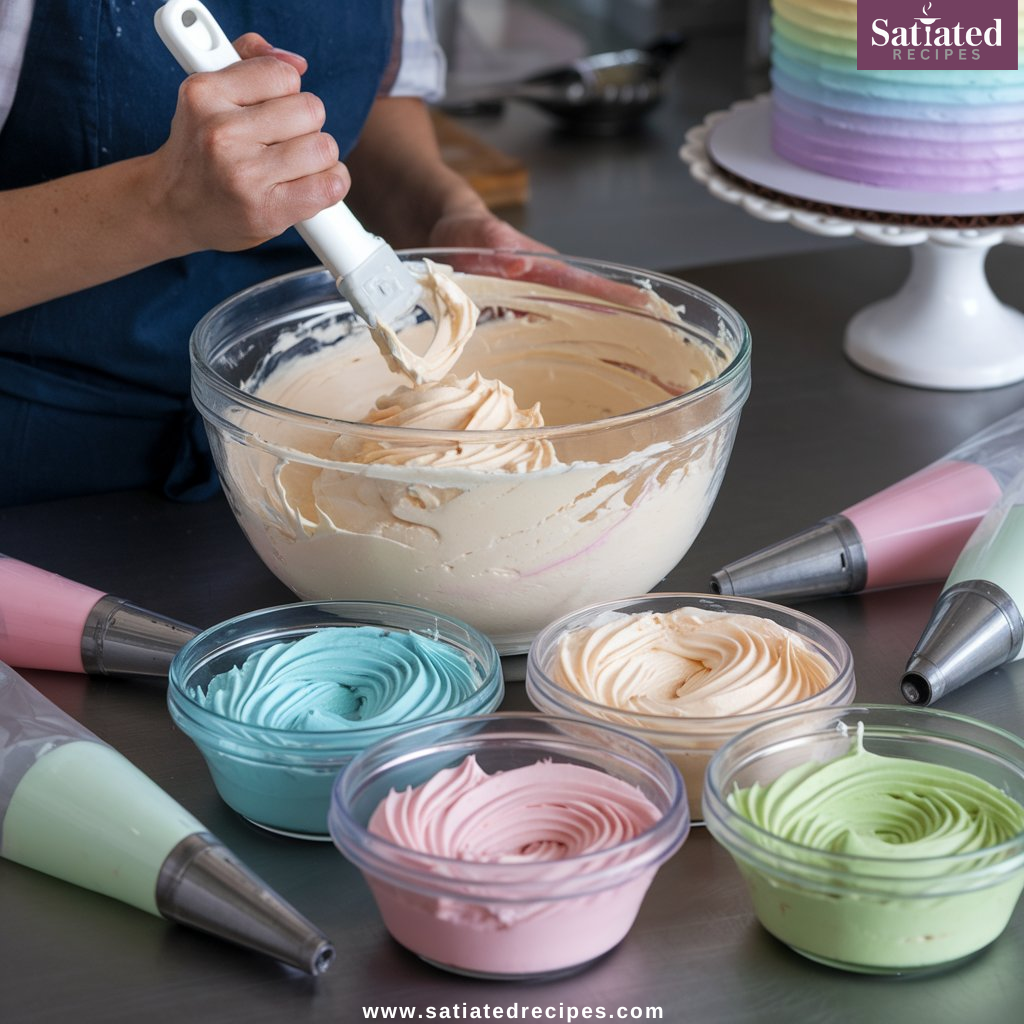
Step 2: Divide the Frosting and Add Color
Once your buttercream is ready, divide it into separate bowls for each color you plan to use on your unicorn cake. Stir in gel food coloring to each bowl until you reach the pastel tones you’re aiming for—think soft pinks, purples, blues, and yellows. Gel food coloring is ideal as it delivers rich, vibrant hues without affecting the consistency of the frosting.
Step 3: Load Piping Bags with Colorful Frosting
Now it’s time to get creative! Fit piping bags with your desired piping tips—star or petal tips are great for creating textured swirls and ruffles. Fill each bag with the different colored buttercream, making sure the colors don’t mix together. For an ombré effect, you can layer the different colors inside the piping bag so that each swirl has a beautiful gradient.
Step 4: Cover the Cake with a Pastel Ombre Effect
Starting from the bottom, apply the frosting in gentle swirls, working your way to the top of the cake. Use the different colors to create a smooth, gradual transition, or pile the frosting on for a fun, textured look. Don’t worry about perfection—part of the charm of a unicorn cake is its playful, colorful nature.
Once your cake is covered in fluffy, pastel buttercream, you’ll be ready to move on to the fun part—adding the magical unicorn decorations! Stay tuned for that next step.
Adding the Magical Unicorn Decorations
Now comes the fun part—transforming your cake into a unicorn masterpiece! This is where the magic truly happens, and the cake starts to look like something straight out of a fairytale. Here’s how to add those magical unicorn decorations that will make your cake the star of the party.
Step 1 : Craft the Fondant Unicorn Horn and Ears
To create the iconic unicorn horn, roll out some white fondant into a cone shape. Use your hands to taper one end into a point, and then twist the fondant as you form the cone to give it that signature spiral effect. Once shaped, use edible gold dust or paint to give the horn a shimmering finish.
For the ears, roll out small pieces of fondant and shape them into ovals. Use a bit of pink or purple fondant for the inner part of the ears, attaching it with a bit of water or edible glue. Once your ears and horn are ready, place them gently on top of the cake, positioning the horn slightly off-center for that magical look.
Step 2: Create the Unicorn’s Flowing Mane with Buttercream
Now it’s time to give your unicorn cake its flowing, colorful mane. Use your piping bags filled with pastel buttercream and pipe beautiful, soft swirls of frosting around the top and sides of the cake. You can mix up the colors in any pattern you like, creating a playful rainbow of pastel shades that look like a soft, cascading mane.
Consider using a variety of piping tips—star tips will give you textured swirls, while petal tips can create a delicate ruffled effect. Layering these different techniques will add depth and interest to the mane.
Step 3: Add Some Extra Sparkle with Rainbow Sprinkles
To give your unicorn cake that extra sparkle, finish it off with a generous sprinkle of rainbow confetti or edible glitter. These little touches will reflect light and add a magical twinkle to your creation, making it look even more enchanting.
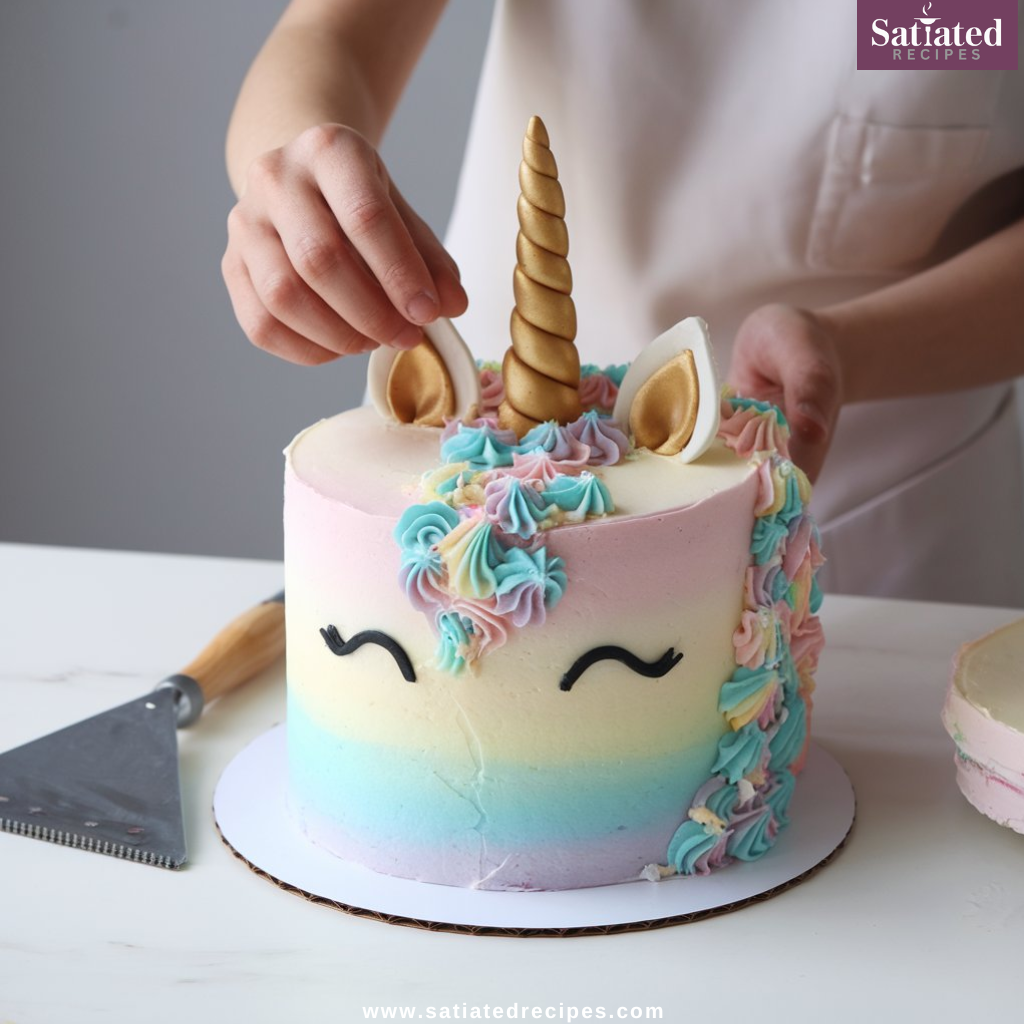
Step 4: Place the Horn and Ears on Top
Finally, place your fondant horn and ears on top of the cake, ensuring they’re secure. The horn should sit upright, with the ears gently flanking it on either side. You can use a small amount of frosting or edible glue to attach them firmly.
With the unicorn horn, colorful mane, and sprinkle of magic, your cake is starting to look like something out of a dream. Now, all that’s left is to admire your work (and maybe sneak a taste of that buttercream)! Let’s move on to some helpful tips for perfecting your unicorn cake.
For additional inspiration and a visual guide, check out this YouTube tutorial on decorating a unicorn cake
Tips for Perfecting Your Unicorn Cake
Creating a unicorn cake may seem like a whimsical, dreamy project, but a few helpful tips can make the process smoother and ensure your cake turns out picture-perfect. Here are some expert tips to elevate your unicorn cake and make it truly magical.
Tip 1: Chill the Cake Layers Before Stacking
After you’ve baked and leveled your cake layers, it’s a good idea to chill them in the fridge for at least 20–30 minutes. This helps firm them up, preventing any wobbling or shifting when you stack the layers. It also makes frosting the cake much easier, ensuring that the layers stay neat and stable as you work.
Tip 2: Practice Piping Designs Before Decorating
If you’re new to piping or want to perfect your techniques,
Spend a little time experimenting with your designs on parchment paper before transferring them to the cake. This will give you a better sense of control over your piping bags and tips, ensuring you’re comfortable with creating the swirls and ruffles for the mane.
Tip 3: Use a Turntable for Even Frosting
A turntable is a must-have for cake decorating, allowing you to effortlessly rotate the cake while applying buttercream, ensuring a smooth, even, and flawless finish. If you don’t have a turntable, you can use a lazy Susan or simply turn the cake by hand, but a turntable will make the process much more efficient.
Tip 4: Don’t Rush the Decorating Process
Creating a unicorn cake is a creative process, so take your time! Don’t rush the decorating stage—each swirl of frosting, placement of the horn, and sprinkle of magic add to the charm. If you feel the buttercream is becoming too soft or challenging to work with, pop the cake in the fridge for a few minutes to help firm it up.
Tip 5: Make It Your Own
While a traditional unicorn cake typically features pastel colors and a golden horn, don’t be afraid to make it your own! Experiment with different colors, add fun edible glitter or even try a unique flavor combination that fits your style. The beauty of a unicorn cake is in its whimsy and creativity, so let your imagination run wild!
With these tips in hand, you’re ready to create a unicorn cake that’s not only magical but also beautifully executed. Ready to add the finishing touches and impress your guests?
Frequently Asked Questions (FAQs)
Making a unicorn cake can be a fun, creative project, but it also raises some questions along the way. Here are some of the most frequently asked questions to help clear up any uncertainties you might have as you bake and decorate your magical creation.
1. Can I use a boxed cake mix instead of making the cake from scratch?
Absolutely! If you’re short on time or prefer a more straightforward approach, a boxed cake mix works perfectly fine. Simply make sure to follow the instructions step by step and feel free to add a little extra vanilla extract or flavoring to make it your own.
2. How do I make the unicorn horn stay upright on the cake?
To ensure the unicorn horn stays securely in place, you can use a small amount of frosting or edible glue to attach it to the top of the cake. You can also insert a wooden dowel or a cake pop stick inside the horn to provide extra stability before placing it on the cake.
3. Can I make the unicorn cake ahead of time?
Absolutely! and keep them in an airtight container, either at room temperature or refrigerated, for up to 2–3 days. If you plan to make the entire cake ahead of time, it’s best to decorate it the day before your event so the buttercream and decorations stay fresh.
4. How do I achieve the perfect pastel colors for the frosting?
To get the ideal pastel colors, use gel food coloring instead of liquid coloring. Gel food colors give vibrant, consistent hues without affecting the frosting’s texture. Begin with a little and slowly add more until you reach the perfect shades.
5. Can I make the unicorn cake dairy-free or vegan?
Yes! It’s simple to create a dairy-free or vegan unicorn cake by using non-dairy butter, plant-based milk, and egg replacements like flax eggs or chia eggs. You can also make a vegan buttercream by substituting regular butter with dairy-free butter and powdered sugar.
6. How do I store my unicorn cake?
After decorating your unicorn cake, keep it in a cool area, preferably refrigerated in warm weather. To maintain the freshness of the buttercream, store the cake in an airtight container. For longer storage, freezing is an option—wrap the cake tightly in plastic wrap, followed by a layer of aluminum foil before placing it in the freezer.
These FAQs are designed to address common concerns and help you achieve a flawless unicorn cake. If you have additional questions, don’t hesitate to drop them in the comments!
Conclusion:
And there you have it—a step-by-step guide to creating the perfect unicorn cake! From preparing the cake layers to crafting the magical unicorn decorations, every step brings you closer to creating a whimsical masterpiece that’s sure to wow your guests. Whether it’s for a birthday bash, a special occasion, or simply a fun baking adventure, this unicorn cake is bound to be the star of the show.
Remember, the most essential part of making a unicorn cake is to enjoy the process. Be creative, take your time, and don’t be afraid to add your own personal touch. Whether you’re a seasoned baker or a beginner, with these simple steps and a little bit of magic, you’ll create a cake that’s as beautiful as it is delicious.
Now, it’s time to let your creativity soar! Happy baking, and may your unicorn cake be as enchanting as your imagination!
Looking for more celebration-worthy desserts? Browse our birthday cake recipe collection.